
MCP connects a supported AI app to Invoice Crowd. You choose which business records the app can access.
1. Check your account
Use an eligible current paid monthly or yearly account with MCP access. Free, trial, lifetime/LTD and ended accounts cannot use MCP. The AI app must also support custom MCP connections.
2. Open How to Connect
As the owner, go to Account menu → Integrations → AI Connections → How to Connect.
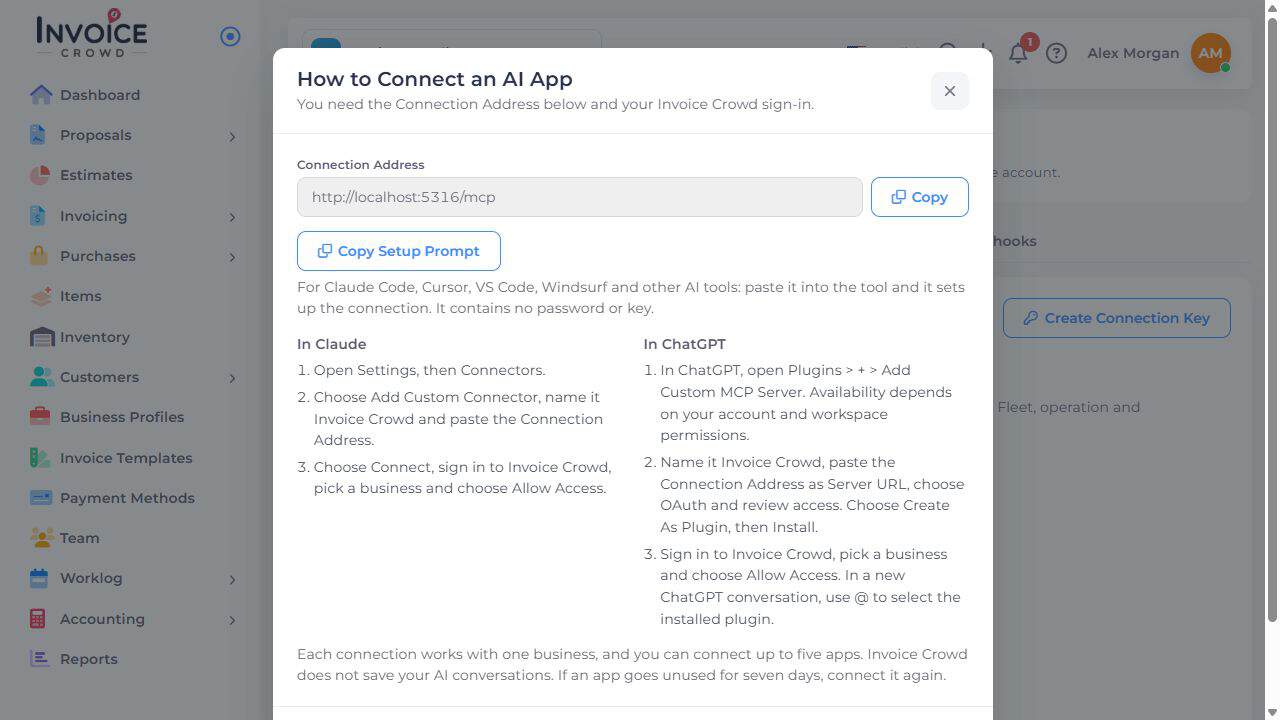
3. Use the displayed setup
Copy the HTTPS Connection Address from your own Invoice Crowd account; the image address is illustrative. In ChatGPT, open Plugins → + → Add custom MCP server. Name it Invoice Crowd, paste the address as Server URL and choose OAuth. Review the warning, choose Create as a plugin, then Install. Complete Invoice Crowd authorization and use @ to select the installed plugin in a new chat. In Claude, open Customize → Connectors (or Plugins in the newer layout), choose + Add → Add custom connector, and follow the address and authorization prompts. Availability depends on your account and workspace permissions.
4. Review authorization
Sign in to Invoice Crowd, choose the business, and check each requested access area before choosing Allow Access.
5. Check the saved connection
Return to AI Connections and verify the app, business, and access. Review a proposed change before approving it.
6. Review requested changes
Review the current request and its preview in Invoice Crowd before approving a supported change. Check the business, customer or vendor, dates and amounts. Read the completion result before trying the same action again.
If a connection fails, check account eligibility, business permissions and expiry before creating another connection. Keep connection keys private.